
Following LEGO® Technic 42128 Heavy-Duty Tow Truck last year, LEGO pneumatics are still going strong and are now present in 42144 Material Handler. As a model, it resembles a cross between 42006 Excavator and 42053 Volvo EW160E, clad in red. As a source of elements for your creations, let’s see what it delivers.
Products in this article were provided by LEGO®; the author's opinions are their own.
LEGO® Technic 42144 Material Handler
£104.99 / US$149.99 / 119.99€ / AU$199.99
835 parts
1 August 2022
If buying from LEGO.com please consider using our affiliate links, we may get a commission: USA LEGO Shop | Australia LEGO Shop | UK LEGO Shop/for Europe 'Change region'.
Parts in new colours
This set doesn’t bring any new moulds, so you might already be able to build it with your own parts, as long as you don’t mind different colours.
There aren’t many recolours included, but one of them is significant.

Pneumatic Cylinder 2 x 11 with 2 Stepped Inlets [V2] (19478) was previously available only in Yellow. Now it comes in Dark Bluish Grey, which will be a lot easier to integrate in models of all colours without clashing so much. The set comes with two of these, with Element ID 6383181.

The Material Handler’s claw is primarily composed of 4x Technic Grabber Arm Claw with 3L Thick Beam [Type 2] in Dark Bluish Grey (6382806 | 19540). This colour is also new for this mould, which was previously available only in Black. Curiously, this element is absent from the parts inventory at the end of the instructions booklet.
Other parts of interest
Some rare or otherwise interesting elements are also present.

The following parts in Red are uncommon, most of them having appeared previously in 42143 Ferrari Daytona SP3:
- 3x Technic Panel Fairing 2 x 3 x 1 (6381442 | 71682)
- 5x Technic Beam 2 x 3 L-Shape with Quarter Ellipse Thick (6381444 | 71708)
- 1x Technic Panel Curved and Bent 6 x 3 (6285602 | 35396)
- 1x Technic Panel Curved 3 x 13 (6334499 | 28923)
There’s also 10x Technic Beam 2 x 3 L-Shape with Quarter Ellipse Thick in Dark Bluish Grey (6353303 | 71708). This appeared previously only in 42129 4x4 Mercedes-Benz Zetros Trial Truck.

Pneumatic parts are always interesting. The newly recoloured cylinder mentioned above is complemented by these elements (besides the common T-piece):
- 1x Pneumatic Cylinder 1 x 5 with 2 Stepped Inlets [V2] in Yellow (6387401 | 26646)
- 3x Pneumatic Switch with Pin Holes, Axle Hole and Stepped Outlets in Light Bluish Grey (6099773 | 19474)
- 1x Pneumatic Pump Large (11L) with 1 x 3 Liftarm in Blue (6152004 | 26288)
Sticker sheet in 42144 Material Handler
There is a single sticker sheet included.

The "LT" logo is quite interesting, and it'd be a good candidate for a global "LEGO Technic" logo to be integrated in other future sets, but I do think the choice of blue contrasts a bit too much with the red background. I'm a bit tempted to reproduce it with physical bricks, to have on the LEGO Technic dioramas I display at events.
The generic black and yellow hazard stripes are useful for other builds; each one is four modules long.
The build
The building process is divided in 3 stages. It starts with the chassis, then the superstructure, and finally the arm.

The set doesn't get off to a good start: the chassis is as basic as it gets, with each outrigger having to be individually deployed instead of having them linked together, even if in pairs. Only one axle has steering, even though it'd be trivial to have it on all four wheels.

In this front-on view of the non-steered end, you may be able to see the middle hole in the upper grey beam unobstructed all the way in to the steering axle. It'd just be a matter of extending that axle and replicating the rack-and-pinion steering on this end. Since this isn't a licensed set, and therefore doesn't have to conform to some real-life machine's specs, the only reason I can imagine for this shortcoming is budget-related.

The second set of bags builds most of the superstructure. This includes the manual pneumatic pump and three switches, and the elevating cabin.

As you can see above, there should be plenty of space to replace the manual pump with a motorised air compressor. If the power supply doesn't fit, it can go in the undercarriage, like other LEGO models that depict this kind of machine have done in the past. That would have the added "benefit" of justifying such an empty and underused undercarriage.

The third set of bags build the arm and the rest of the superstructure. Turning the arm upside down would make a neat humanoid robotic arm, don't you think?

The arm gets attached to the superstructure, the rest of the pneumatic hoses get plugged into the respective ports, and the engine cover is built to cover it all. All that's left to do is to play with the model, or, more likely with New Elementary readers, take it apart and use its elements to create something else.
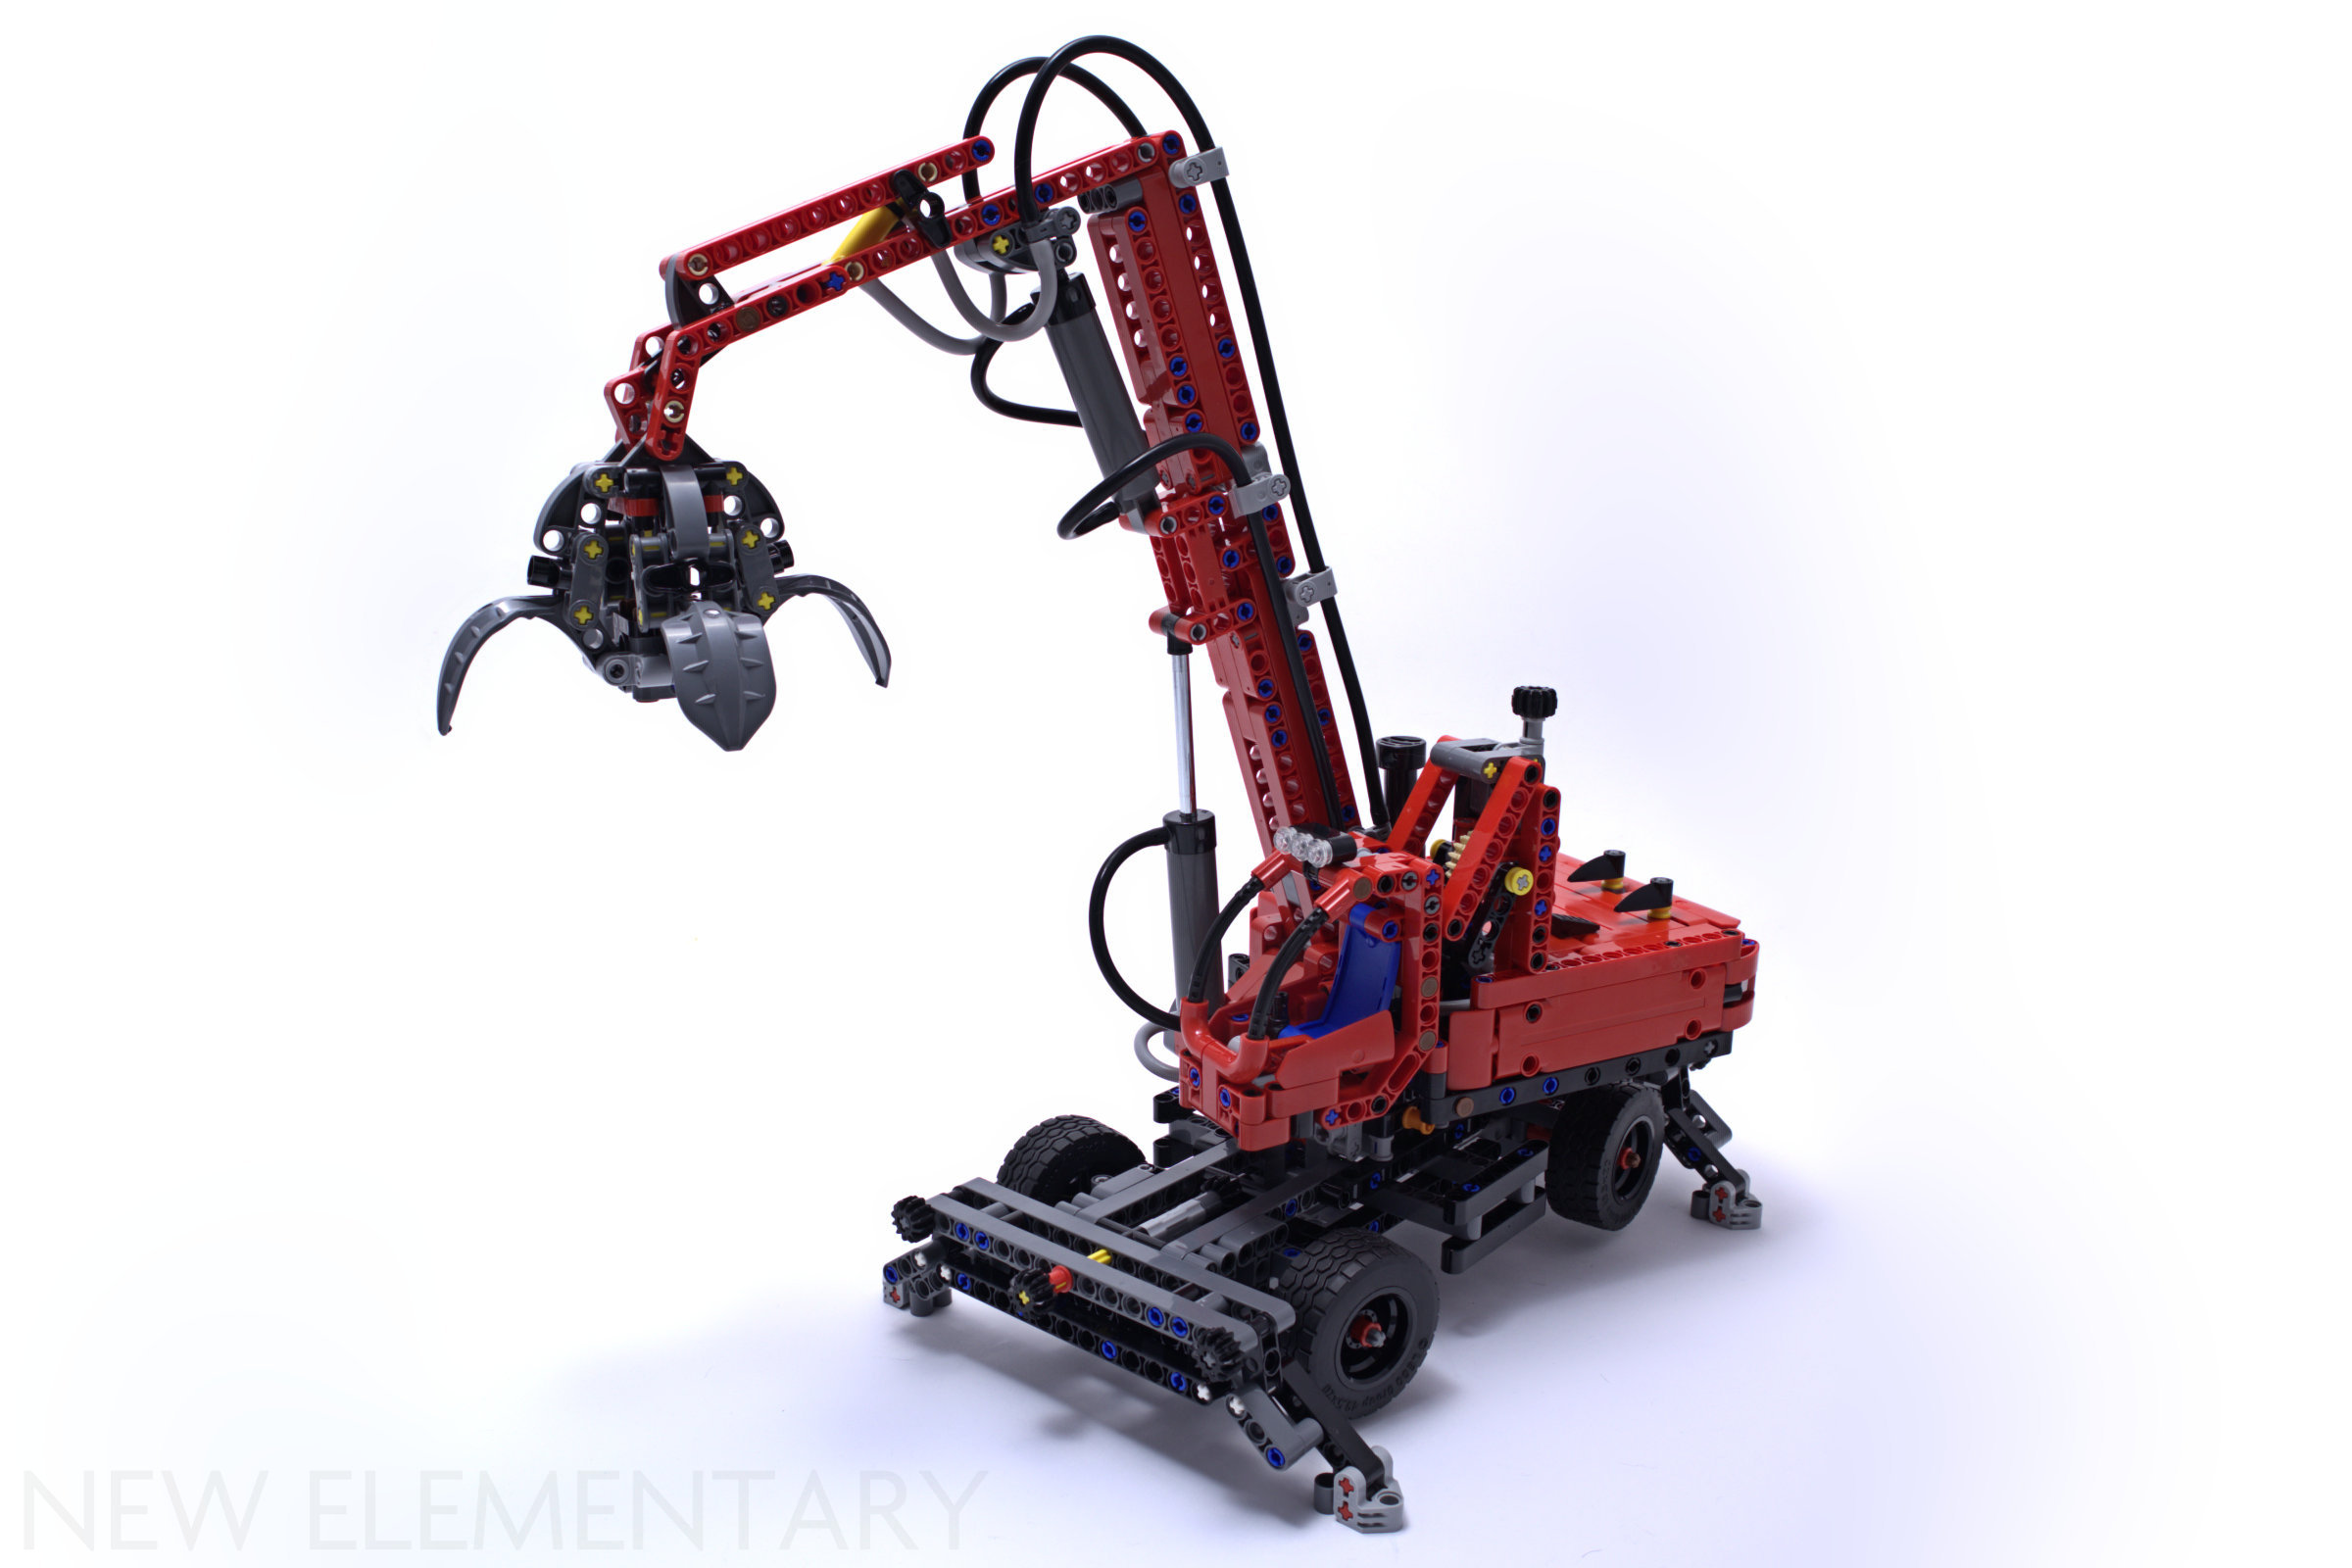
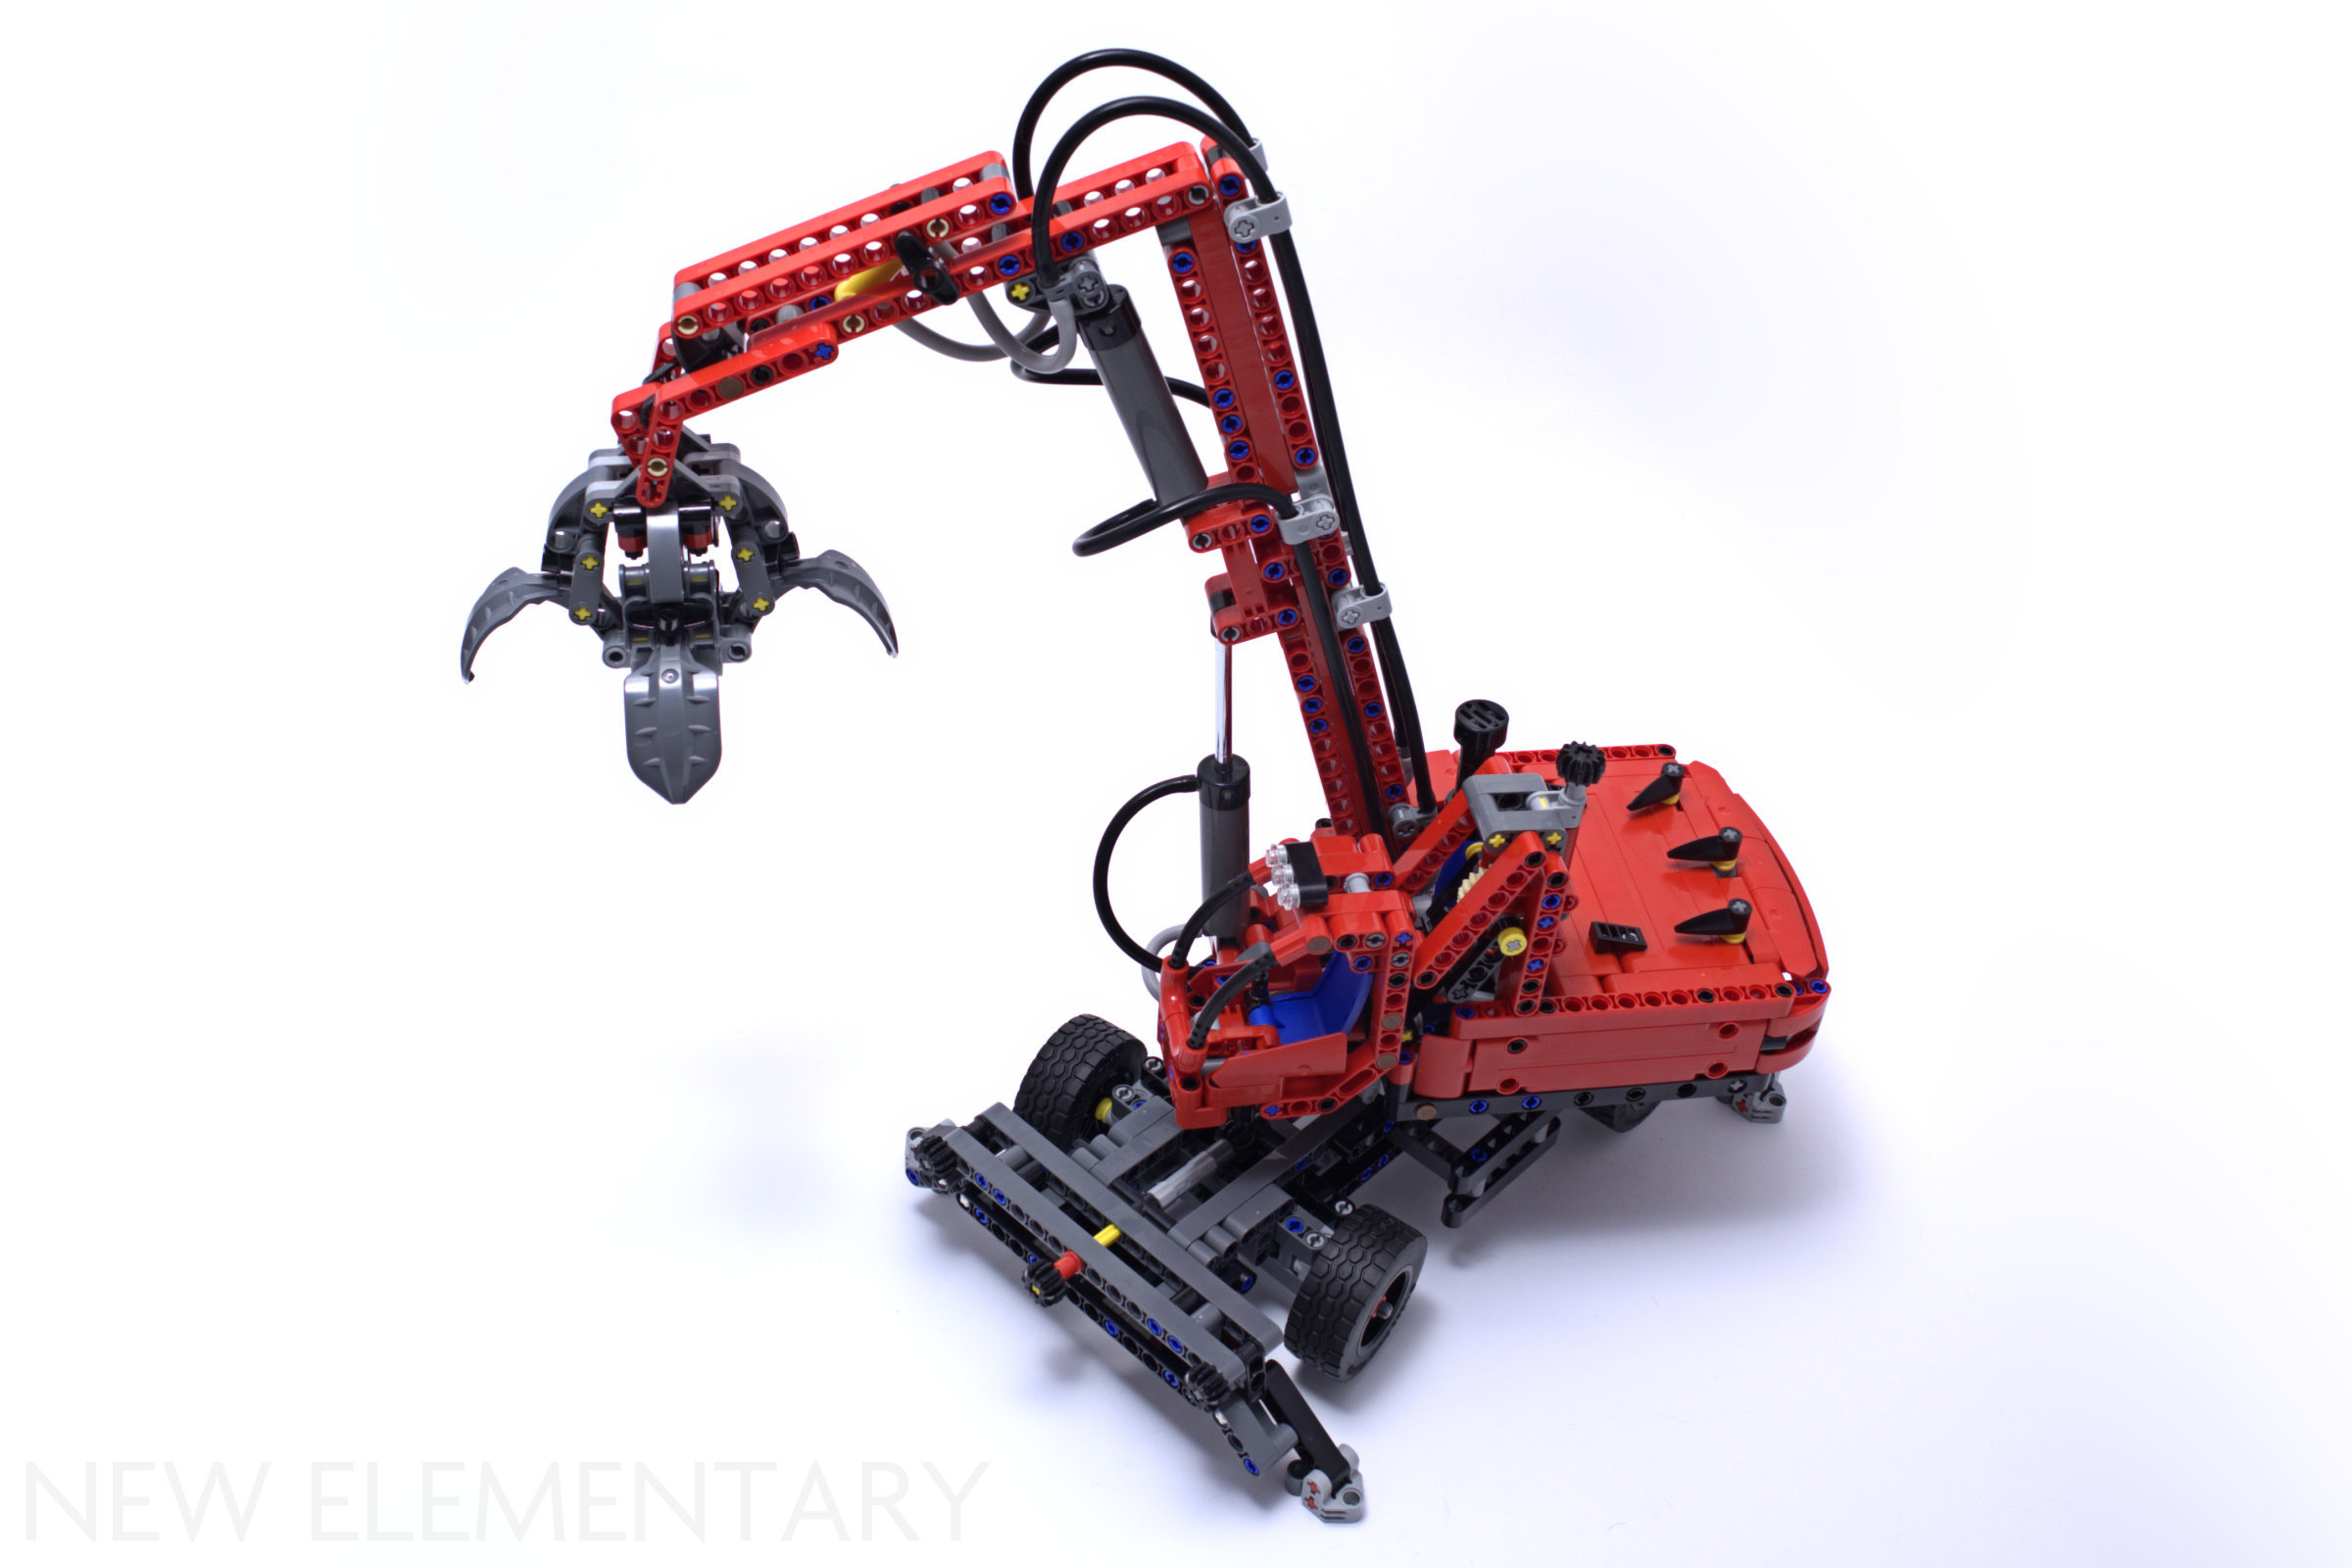
The completed model
On the whole, the building process didn't have many intricacies; I just had to pay attention to which pneumatic hoses went where.

Apart from having to deploy each stabiliser individually, which is inexcusable given all the space available in the undercarriage, all functions work smoothly; you just have to pump a little harder to raise the boom.
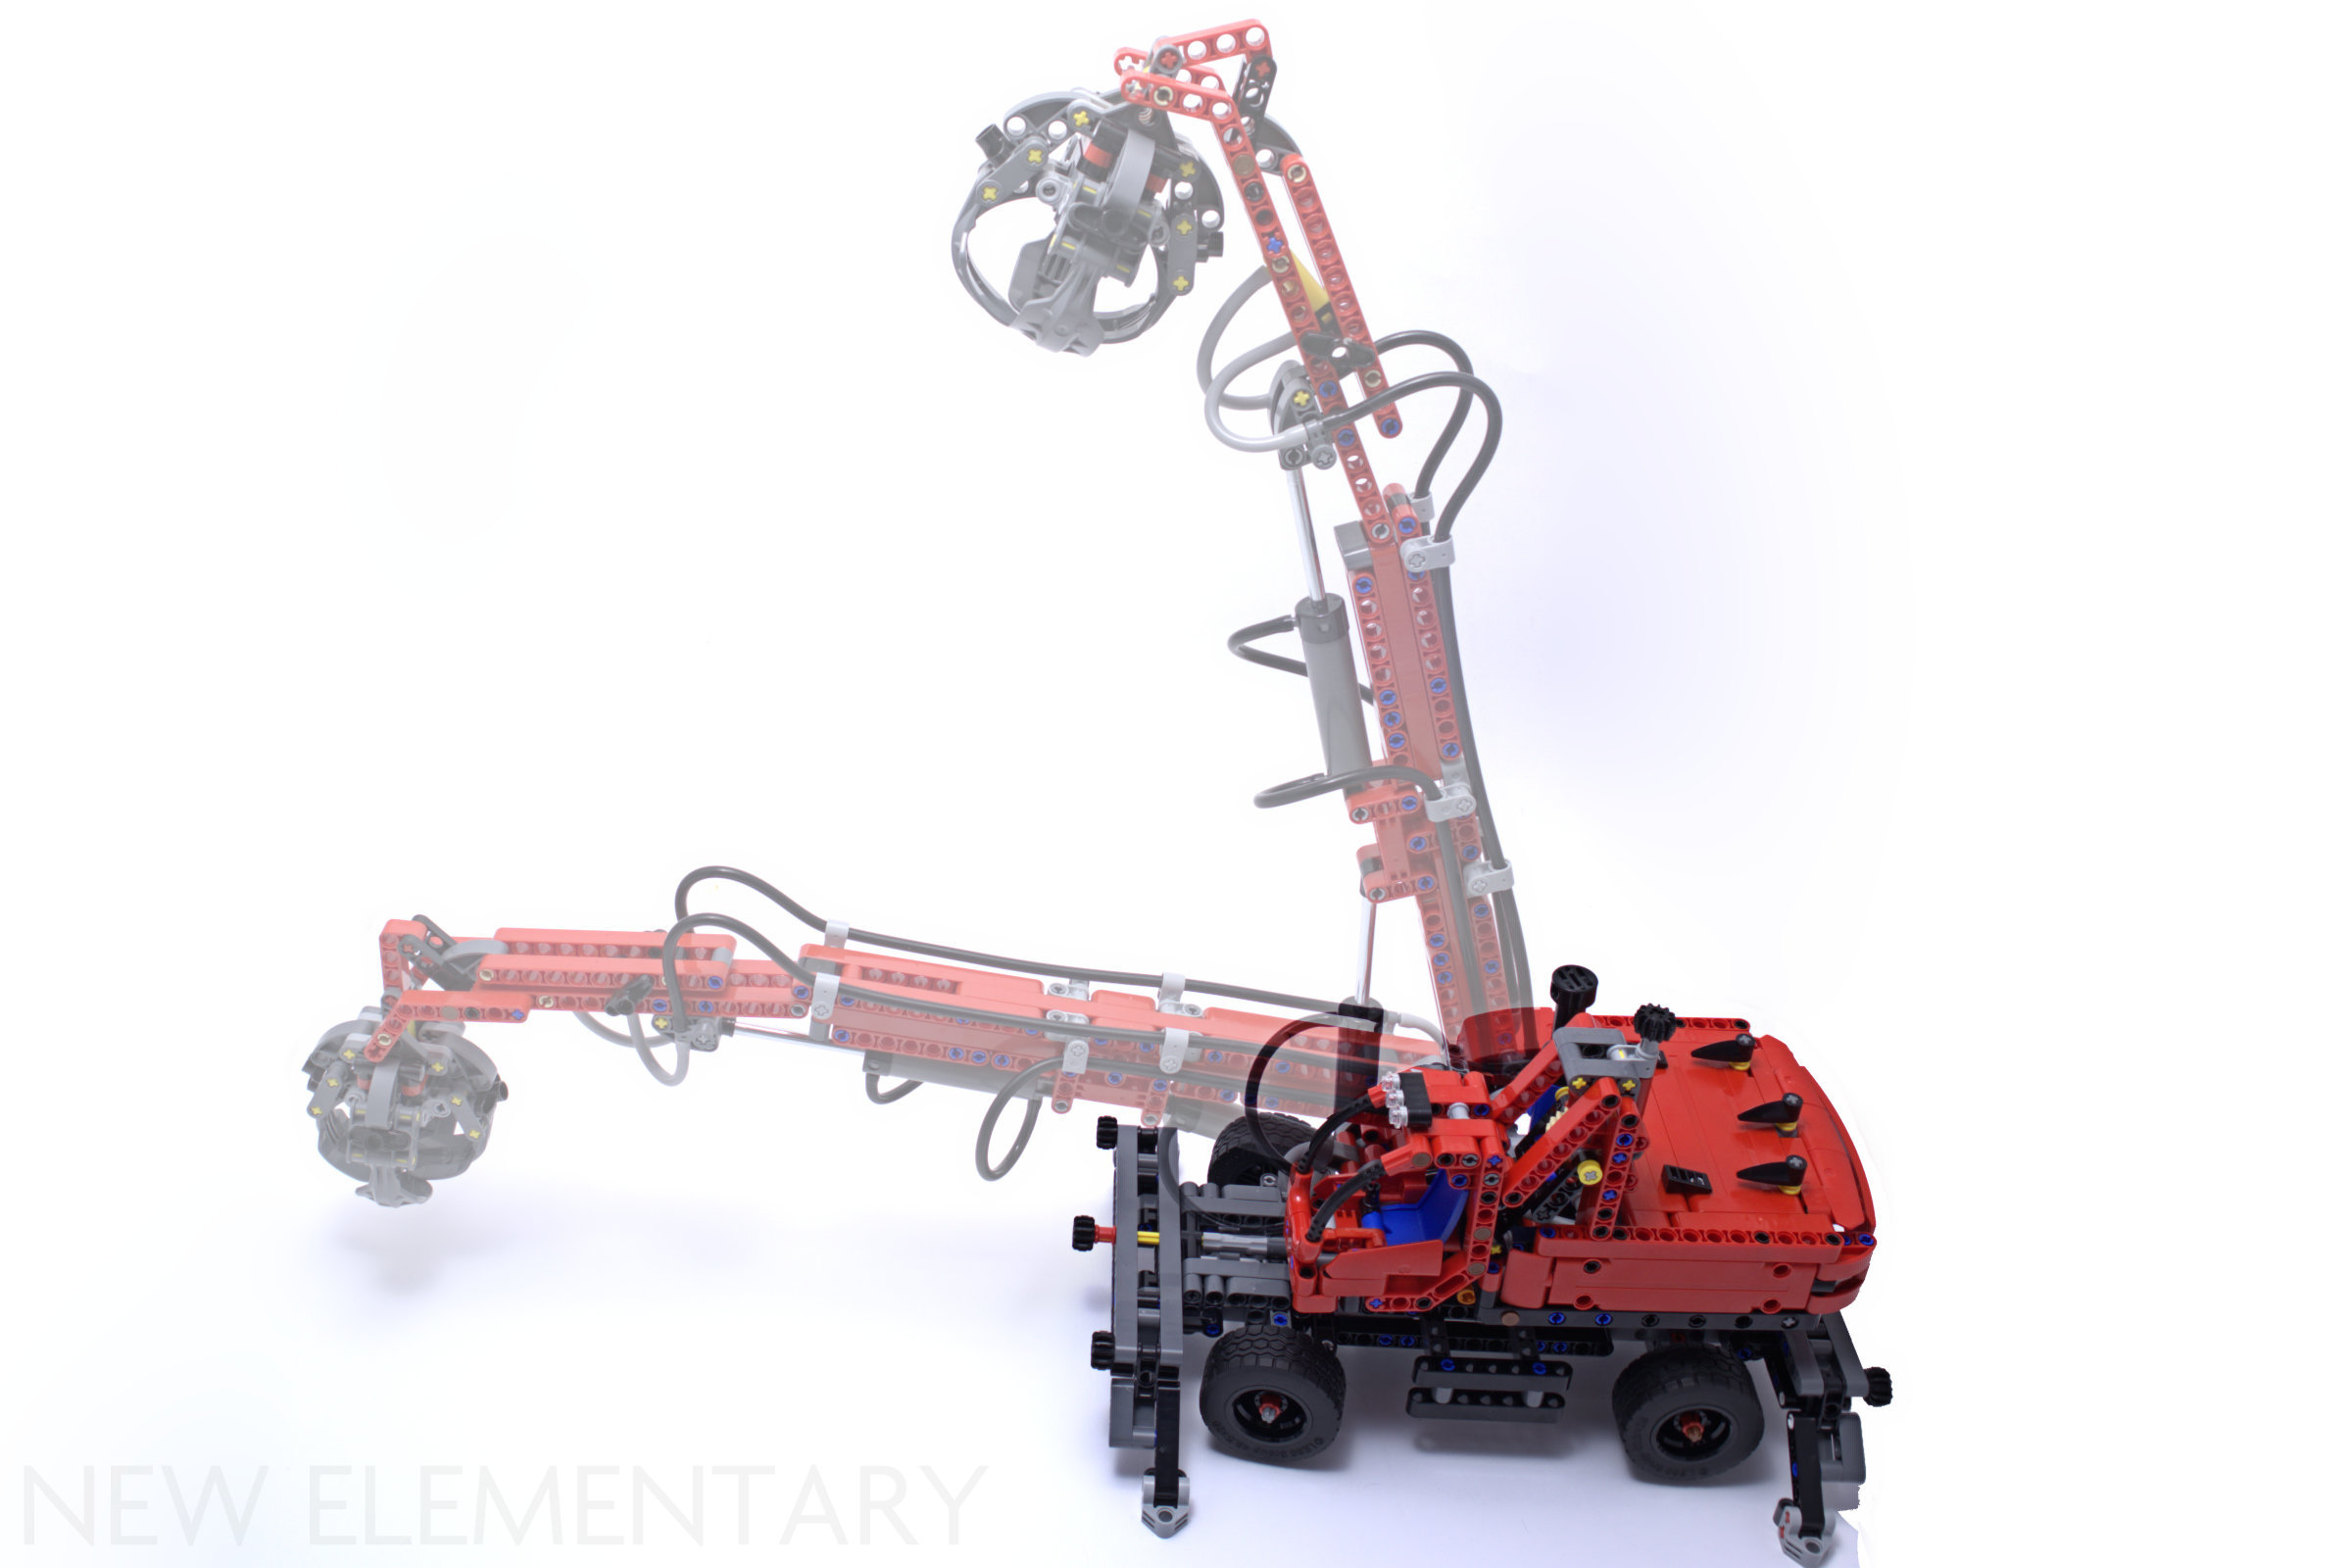
Speaking of the boom, the main reason for it to be a little hard to raise is its size and weight, combined with impressive range of motion: from almost horizontal to almost vertical.

As shown previously, an extra function is cab elevation, activated by the knob on top. This gives the operator a better view of the work area, but they must make sure to lower the cab again before exiting the machine... watch out for the first step.

Here's a view from below. As you can see, the large majority of the undercarriage is structural, but still with plenty of space to add four-wheel steering and/or link the outriggers together.

I was pleasantly surprised with a small detail: the tail lights. If you watch closely, behind each trans-red cheese slope you'll see what I call a "nail pin": Technic Pin Long 3l, No Friction Ridges, with Stop and Hole (77765). In its place, a good ol' regular pin could be used, but it'd be black instead of light bluish grey... most likely, this lighter-coloured element was chosen to make the light pop out a bit more. Giving us more of the uncommon nail pins doesn't hurt, either.
Conclusion
Released on 1 August, this set retails for £104.99 / US$149.99 / 119.99€ / AU$199.99 and contains 835 parts. That doesn't look too good in theory, but LEGO prices just rose globally, plus pneumatic elements are complex and therefore inherently expensive. So, I don't think the price is that bad. Not good, but not outrageous either.
The functions work well, and the chassis is strong enough to withstand pressing down hard on the pneumatic pump, even when the model is standing on the outriggers.
Speaking of outriggers, I can't stress enough how annoying it is to have to manually deploy each one at a time, and lack of four-wheel steering would have been trivial to have.
As for elements, the greatest value in this set is the pneumatic system. You get two large cylinders in a brand-new colour, one small cylinder, three new-style switches, and a manual pump. I just miss the days of add-on motorisation with 8293 Power Functions Motor Set. It also brings many elements that are rare in red, which is always welcome.
So, summing it up, it's a good, moderately-priced source of pneumatic and red elements. As a model, it's playable but begs for an overhaul to the undercarriage.

Yay, I managed to grab a prize, these claw games aren't rigged after all!
READ MORE: LEGO® NINJAGO® 71774 Lloyd's Ultra Golden Dragon reviewed in all its pearl-golden glory
Help New Elementary keep publishing articles like this. Become a Patron!
Massive thanks go to our 'Vibrant Coral' patrons: Antonio Serra, Beyond the Brick, Huw Millington, Big B Bricks, Dave Schefcik, David and Breda Fennell, Richard Selby, Gerald Lasser, Baixo LMmodels, Markus Rollbühler, Elspeth De Montes, Chuck Hagenbuch, Megan Lum, Andy Price, Jf, Daniel Church, and Amy Hays.
LEGO® Shop at Home
USA: FREE SHIPPING every day on orders over $35!
UK: Free delivery when you spend £50 or more at LEGO!
Australia:
Discover the latest promotions and offers on LEGO.com
All text and images are © New Elementary unless otherwise attributed.
There is a new mould for the black top of the 60t turntable that wasn’t mentioned in this review. Maybe it would be helpful to compare the new and old turntables?
ReplyDeleteI believe the new "nail" pin is often used to avoid orientation problems that can arrise with the other "nails" which have stop rings at the 2/3 mark. A standard 3L friction pin can be inserted the right way or the wrong way, with the only difference being the length exposed. It's easy to get this wrong if you're not used to building technic sets. The light gray 3L pin with end stop first appeared on a Darth Vader meditation chamber mechanism which was clearly not aimed at technic fans. It's use prevented frustration and disassembly by Lego fans unaccustomed to fixing pin orientation mistakes. I think the tail light accent was a bonus.
ReplyDeleteAnd it's nice because it can be inserted
Deletethru three liftarms at once, from one side.
So you can have the arrangement of two liftarms with a gap in between, place the third liftarms in the middle, then push the pin in place through them all. When attaching two subassemblies that can be much nicer than having to stack things up like is needed when using a pin w/stop.