For the next leg of our look at minifig space utensils, I'm
exploring two elements:
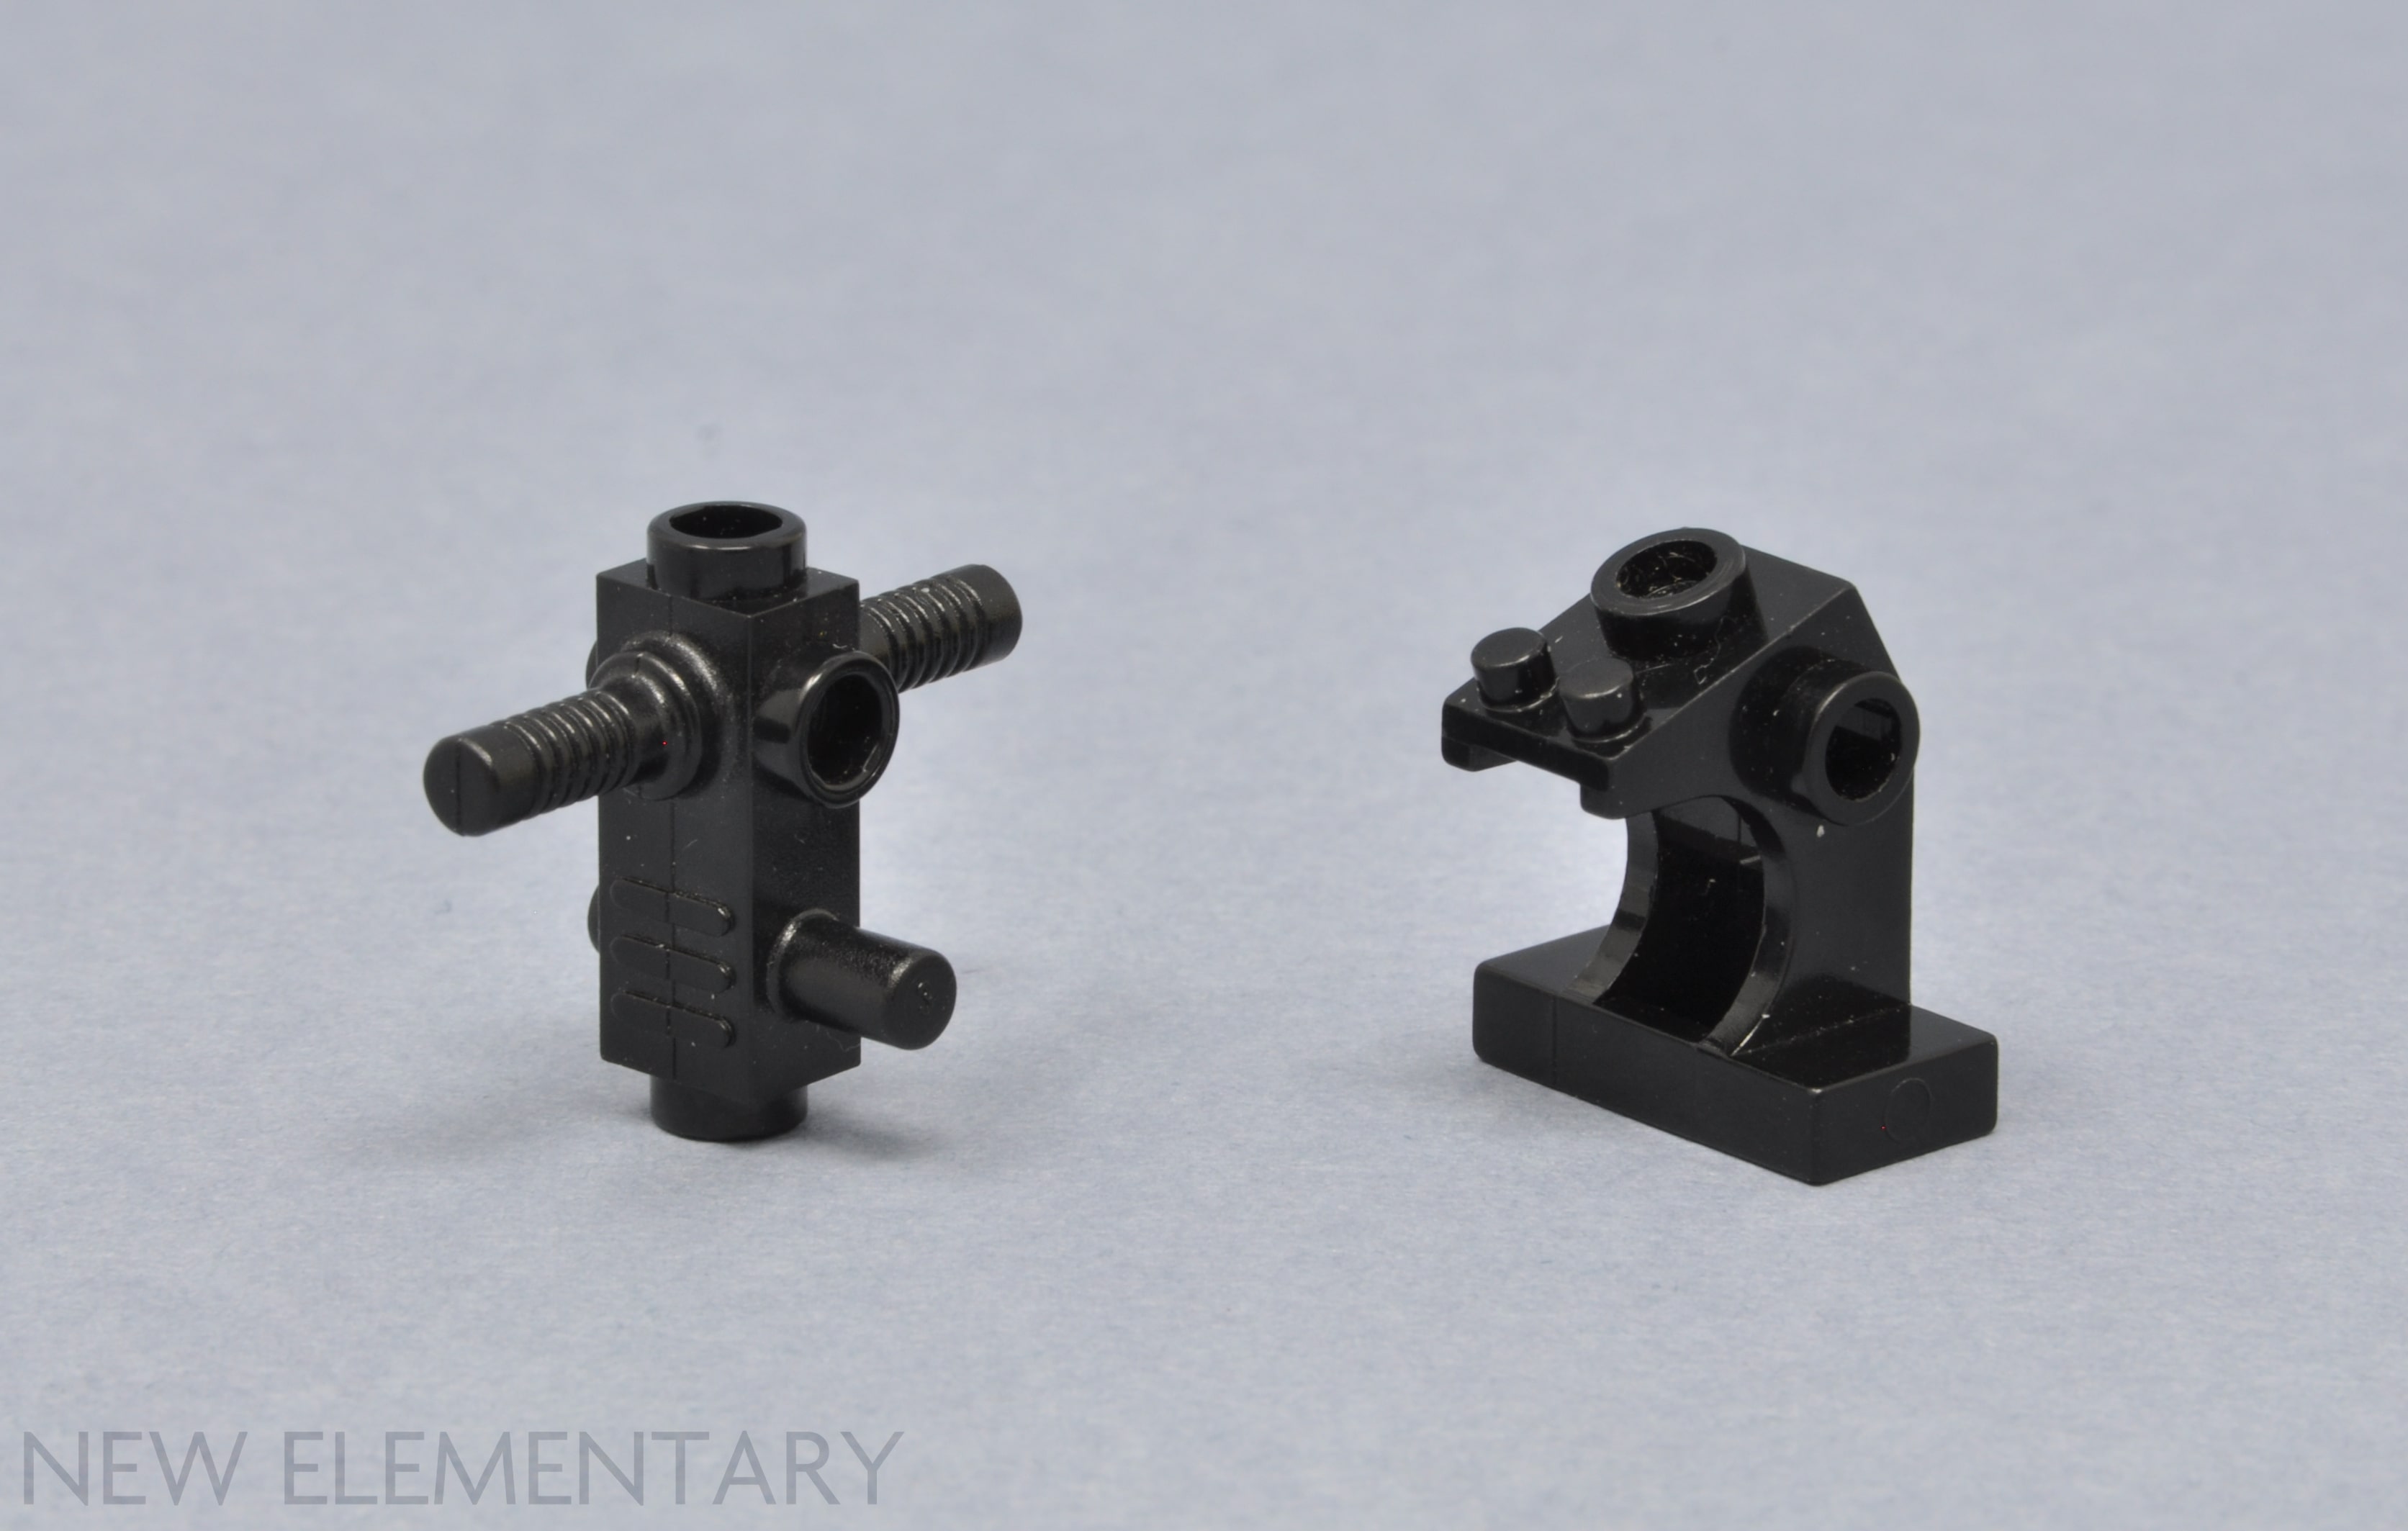
Chainsaw Body (2516) from 1990 and Control Panel (2342) introduced in 1986.
The Control Panel is quite the bizarre mix of angles, open studs, circular cut-outs and a couple of weird peg looking things. Let's start in familiar territory with basic stud and bar connections.
It has three studs, one up top and two on each side, with an additional antistud on the reverse. Bar connections are plentiful since all studs are recessed or open, allowing a bar to slide right the way through from left to right. The rear antistud hole backs onto the cut out on the front, so a bar can intersect the element here too.
Speaking of the rear anti stud hole.. it's square! This puts it in the eclectic ‘square antistuds in weird places’ family.
Turns out a Fez piece matches the radius of the circular cut out perfectly. However, as the two elements were released decades apart, it's clear they were never intended to work together. Just another example of the standard dimensions used across different moulds - albeit a rarely seen one this time.
Time to talk angles. The back of its... shall we say neck?... is a close match to that of a cheese slope. The top is slanted downwards but frustratingly it’s not perpendicular to the cheese slope angle which makes the part a little less useful for practical structural work.
As for impractical structural work, well it's perfect for that! I had a lot of fun stacking them into all manner of abstract, snake-like shapes.
Let's turn our attention to those mysterious top pegs. Their diameter is somewhere inbetween a regular 3.18 bar and a Friends accessory peg, which led to some wild experimentation with weird and wonderful connections. Thanks to the rest of the New Elementary team for chiming in with some combinations I didn't think to try.
The final mystery peg connection we found was with minifigure arm holes,
which prompted the creation of my brand new product idea: vacuum hands!
The ideal way to get bricks off your floor in a matter of seconds.
I hoped the pegs would be compatible with Modulex but alas, they're too small for that. However, as Ryan Howerter's handy
one-stop image of Modulex techniques shows, it's possible to jam a few bricks onto the control panel in a few unlikely spots. But beware, I found the act can inflict a bit of damage to the teeny tiny bricks if you're not careful so proceed with caution if you're tempted to try these connections out for yourself.
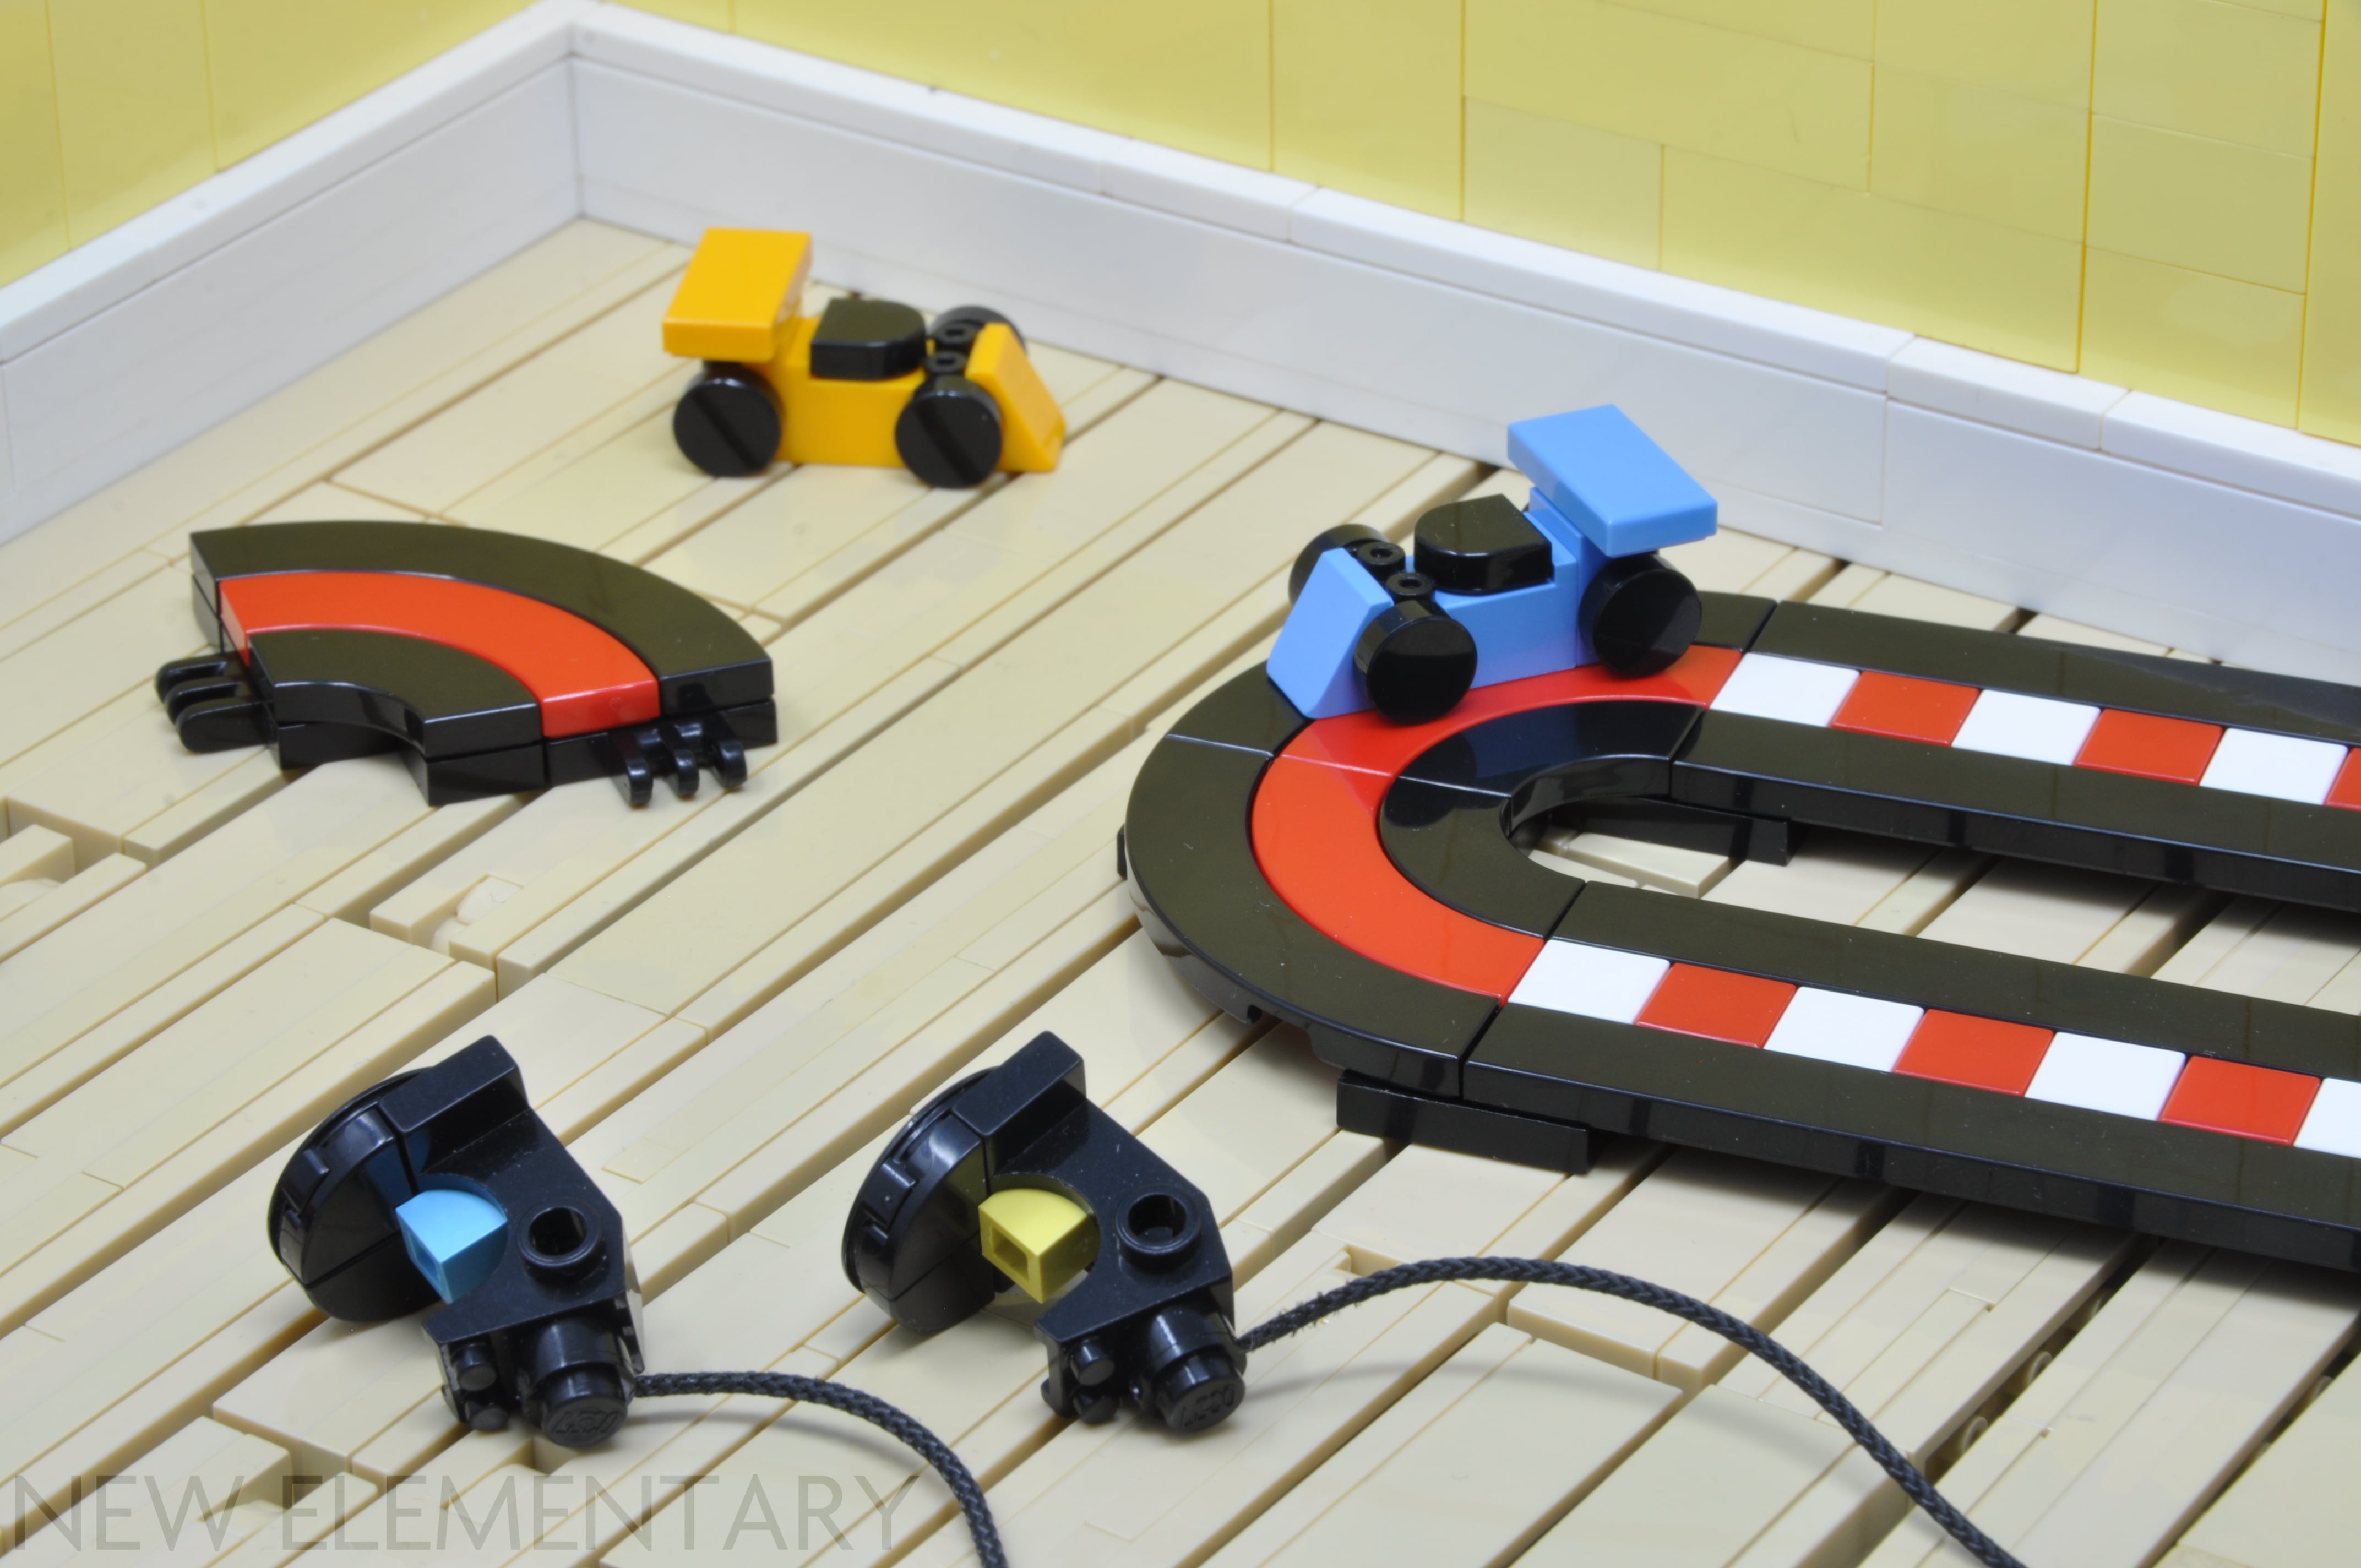
One of the Modulex connections coupled with the curved neck of the control panel reminded me of a Scalextric controller so that became the basis of my second MOC. I also made use of the relatively recent 3x3 curved quarter circle tiles (79393) for the red centre stripe in the track.
2516 Chainsaw Handle Analysis and MOCs
My second element of choice is the chainsaw handle (2516). This thing has even more stud and bar connections going on than the Control Panel, so let's get into it.
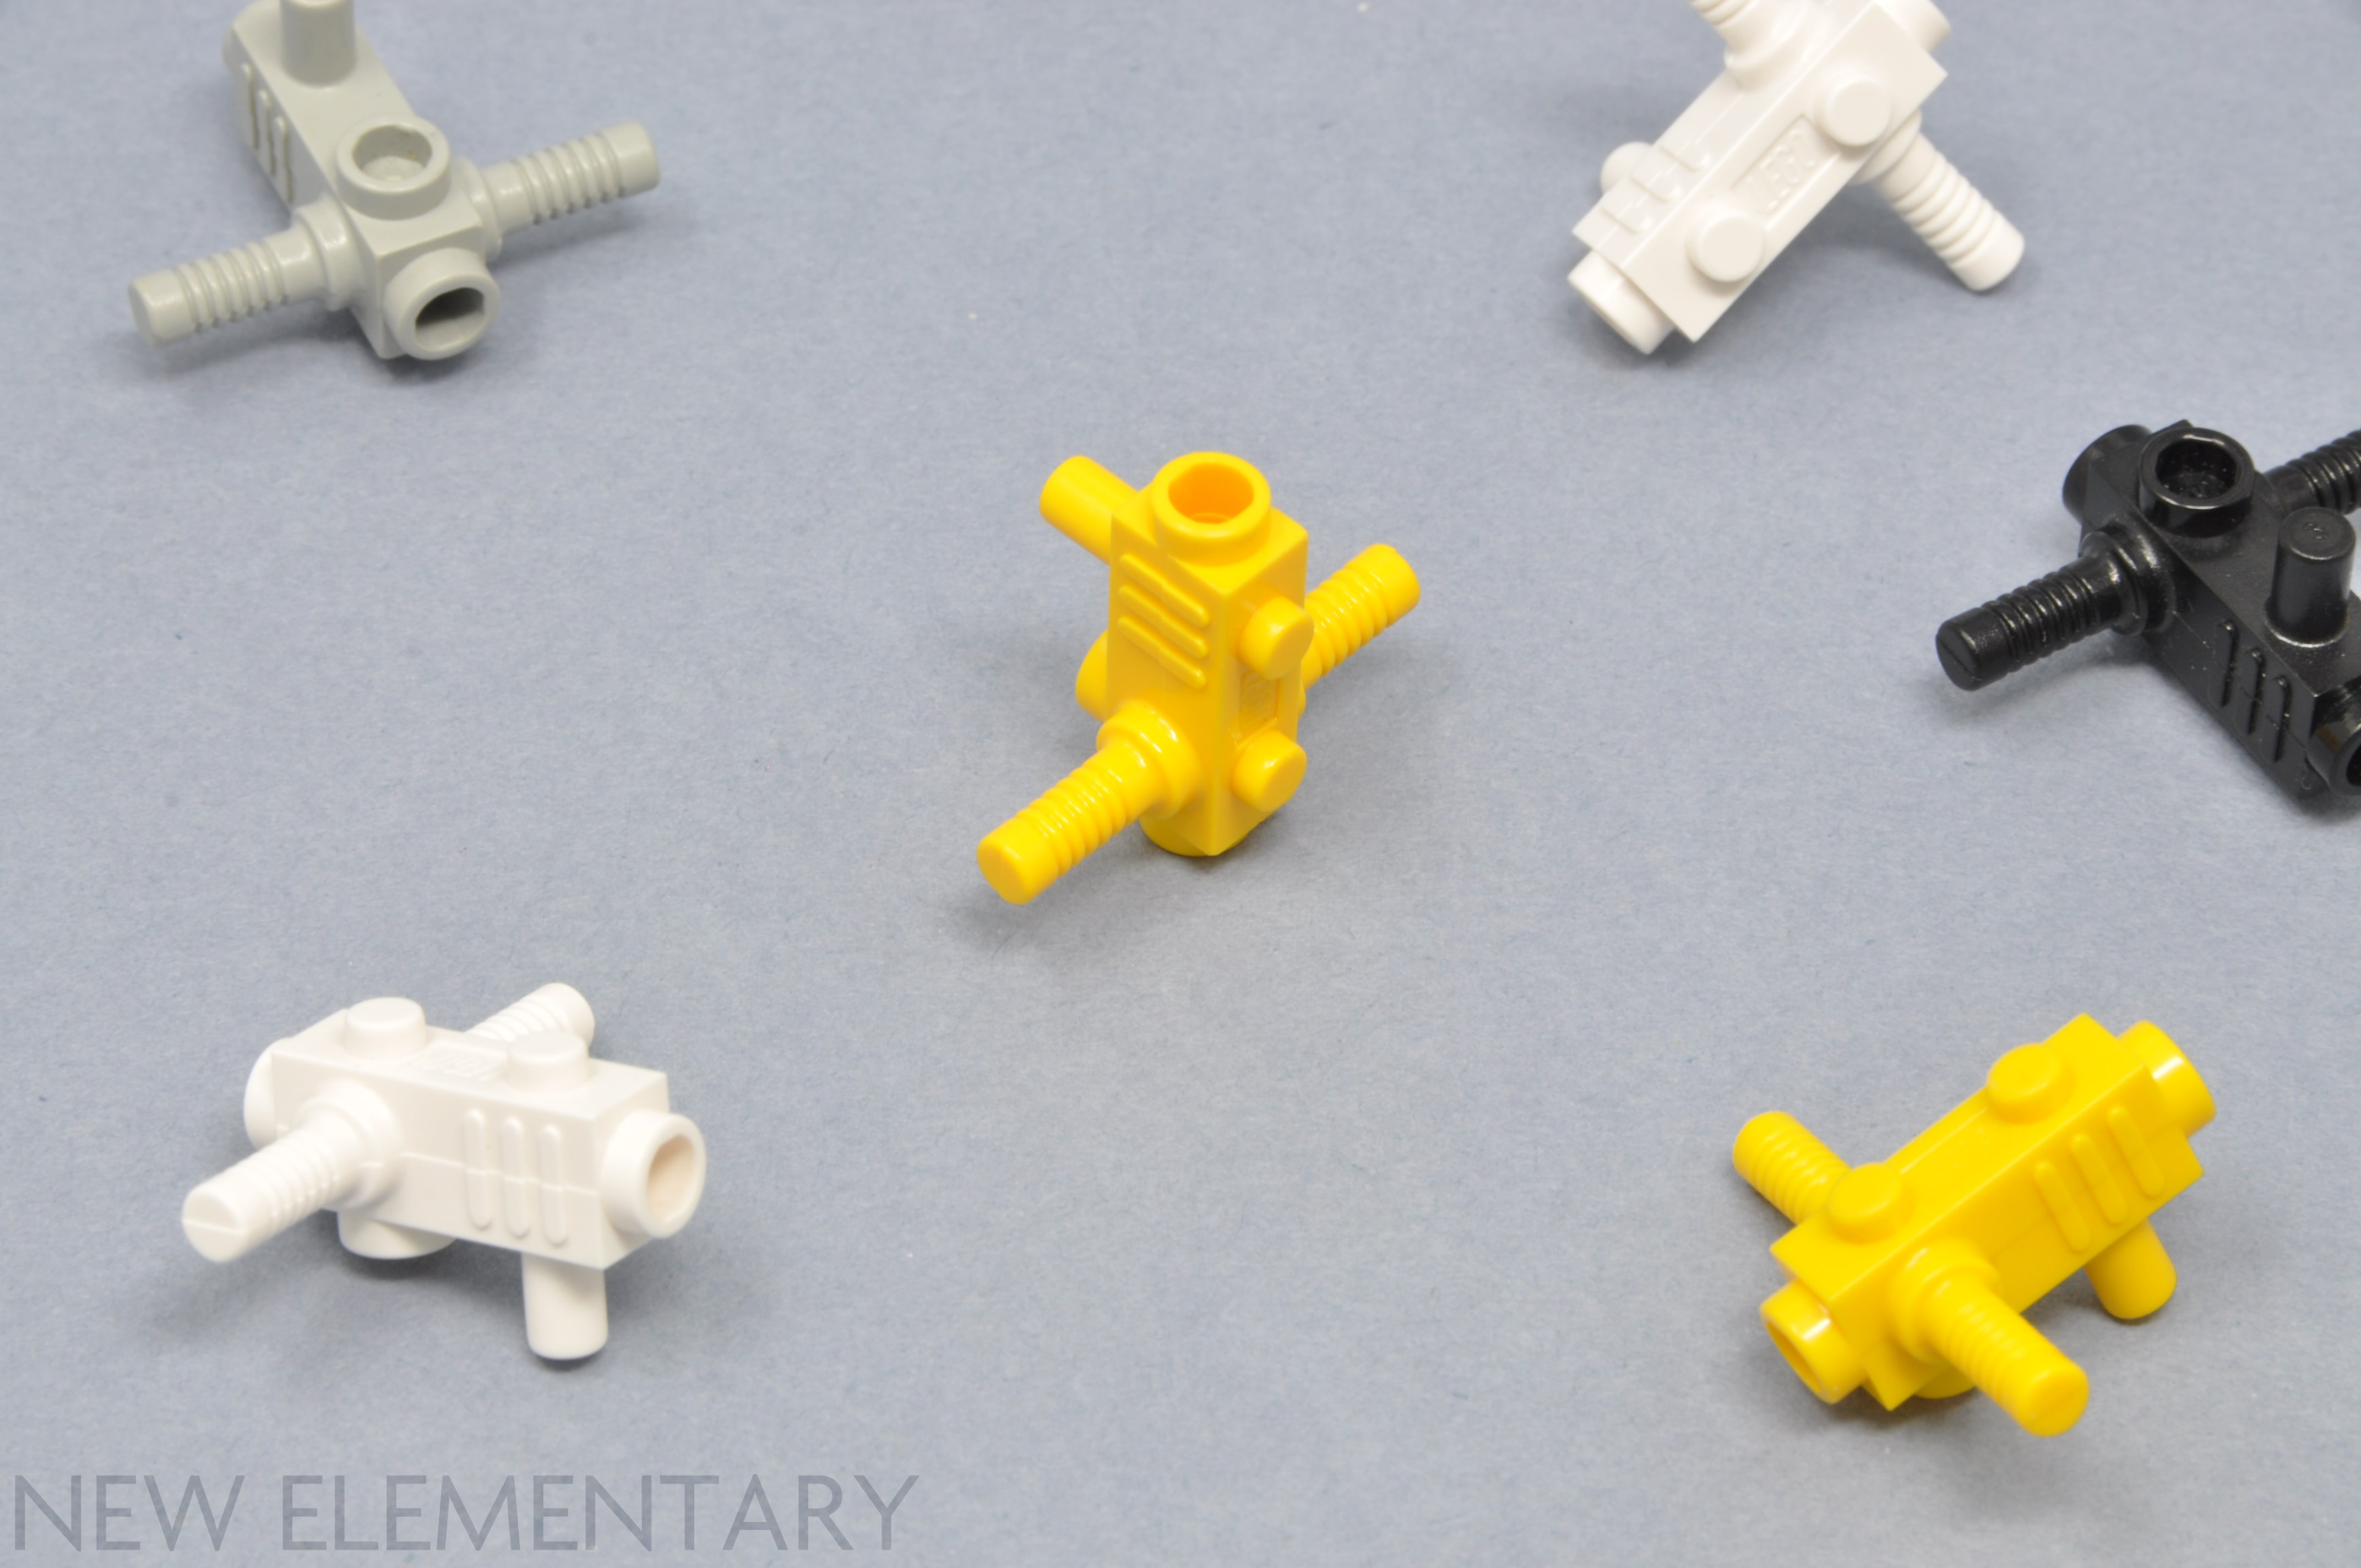
The top has a couple of stubby 3.18mm bars spaced two modules apart, which neatly accepts a 1x2 plate with rounded corners (35480) shown in green. The sides have another pair of bars, longer this time with a ribbed texture similar to those on minifigure tools. A final bar on the base is the perfect length for a minifig hand to hold. As for studs there are three: a recessed one on the base and two open ones front and back.
In testing all those connections I realised there's actually two variations for this part. Some, like the yellow one pictured, have an internal stopper that prevents a bar from sliding all the way through while others permit a bar without problem. Something to watch out for depending on how you plan to use the element.
With older elements I like to see if there are any recent descendants. With its 1.5-plate wide body and stud placement, I think the small handgun (44709) introduced in the LEGO Overwatch line fits the bill. Be sure to take a look at
Jonas Kramm's exploration of that part if you haven't before.
With so many attachment points to choose from, there’s a wide range of ways the element can connect to duplicates, which makes for some funky looking patterns.
The pair of horizontal bars and the element's mechanical appearance just said "periscope" to me, so I ran with that and built a small submarine command room. But I feel I missed a trick in neglecting to use the control panel as a control panel!
All those connection points came in handy to disguise the seed element a little. I was particularly pleased to use a 1x1x2/3 plate (86996) for the view-screen and a neck bracket for its red trim.
Happy though I was with the scene, a submarine control room barely breaks away from the sci-fi aesthetic this parts fest aims to avoid, so I was determined to find some less technological things to build. I took another look at the combinations I made above for inspiration.
Continuing with the playground equipment theme, I took advantage of the protruding bars and end studs to make a classic school lunch table with round road signs as the seats. Also had way too much fun recreating a giant Connect 4 set for the background.
Closing Thoughts
Despite (or maybe because of) the multitude of connection points available, I found both elements were quite tricky to use unobtrusively in non-spacey stuff - which I know is the point of the parts fest but still, that was a bigger challenge than I imagined!
Come back next Thursday when Tim Goddard will be examining the "but are they weapons?" parts: the megaphone and space torch.
READ MORE: Last week Caz Mockett examined the Space Gun / Camera from 1982
Help New Elementary keep publishing articles like this. Become a Patron!
Massive thanks go to our 'Vibrant Coral' patrons: Antonio Serra, Beyond
the Brick, Huw Millington, Big B Bricks, Dave Schefcik, David and Breda
Fennell, Richard Selby, Gerald Lasser, Baixo LMmodels, Markus
Rollbühler, Elspeth De Montes, Chuck Hagenbuch, Megan Lum, Andy Price,
Jf, Daniel Church, and Amy Hays.
LEGO® Shop at Home
USA: FREE SHIPPING every day on orders over $35!
UK: Free delivery when you spend £50 or more at LEGO!
Australia:
Discover the latest promotions and offers on LEGO.com
All text and images are © New Elementary unless otherwise attributed.


Wild experimentation?
ReplyDeletePesky Daleks.. they get everywhere! Now corrected to experimentation.
DeleteGreat analysis. And those quad-bikes are too cute!
ReplyDeleteThanks Kev!
DeleteLots of fun ideas. I will always think of that control panel as a "Robot Torso" due to its usage in the one Blacktron set my brother had. But I'm impressed with all of the unorthodox connection ideas from the New Elementary hive mind.
ReplyDeleteAlso, still trying to figure out how the rear wheels of those slot cars are attached.
Round black tiles attached very loosely on the sides of 11253 roller skates, like in the frint?
DeleteHonestly I love part # 2342... granted I only have 2 black ones left out of the hand full I had in the 90's. But they are super useful as controls or steering platforms for the sci-fi stuff I build. I just wish Lego brought them back to sets like so many other classic 80's/90's parts that they've done over the last year.
ReplyDeleteI'm curious. Do binoculars fit onto the two pegs on the control panel? It seems about right by eye...
ReplyDeleteGreat post!
They dont!
Delete