The second of our two Glorious Galactic Guests joins our Parts Festival today to present some wonderful MOCs using a selection of the minifigure accessories found in Classic Space sets. Ryan Harkin is @brickmasterryan on Instagram.
New Elementary asked me to build something “not space” using a couple of the Classic Space tools from their seed selection. I chose the Axe (3835) and the Robot Arm (4735). Like Benny, my instant reaction was, “Spaceship?”. My next reaction was… well, I’m guessing you’ve seen the movie so you know how this ends.
Persistence paid off, I wore the New E team down, and I got to build some lovely details for LL 232, a small two-seater Neo-Classic Space ship that I have nicknamed Baby Shark (because I think the nose looks like a cute whale shark when viewed from the front).
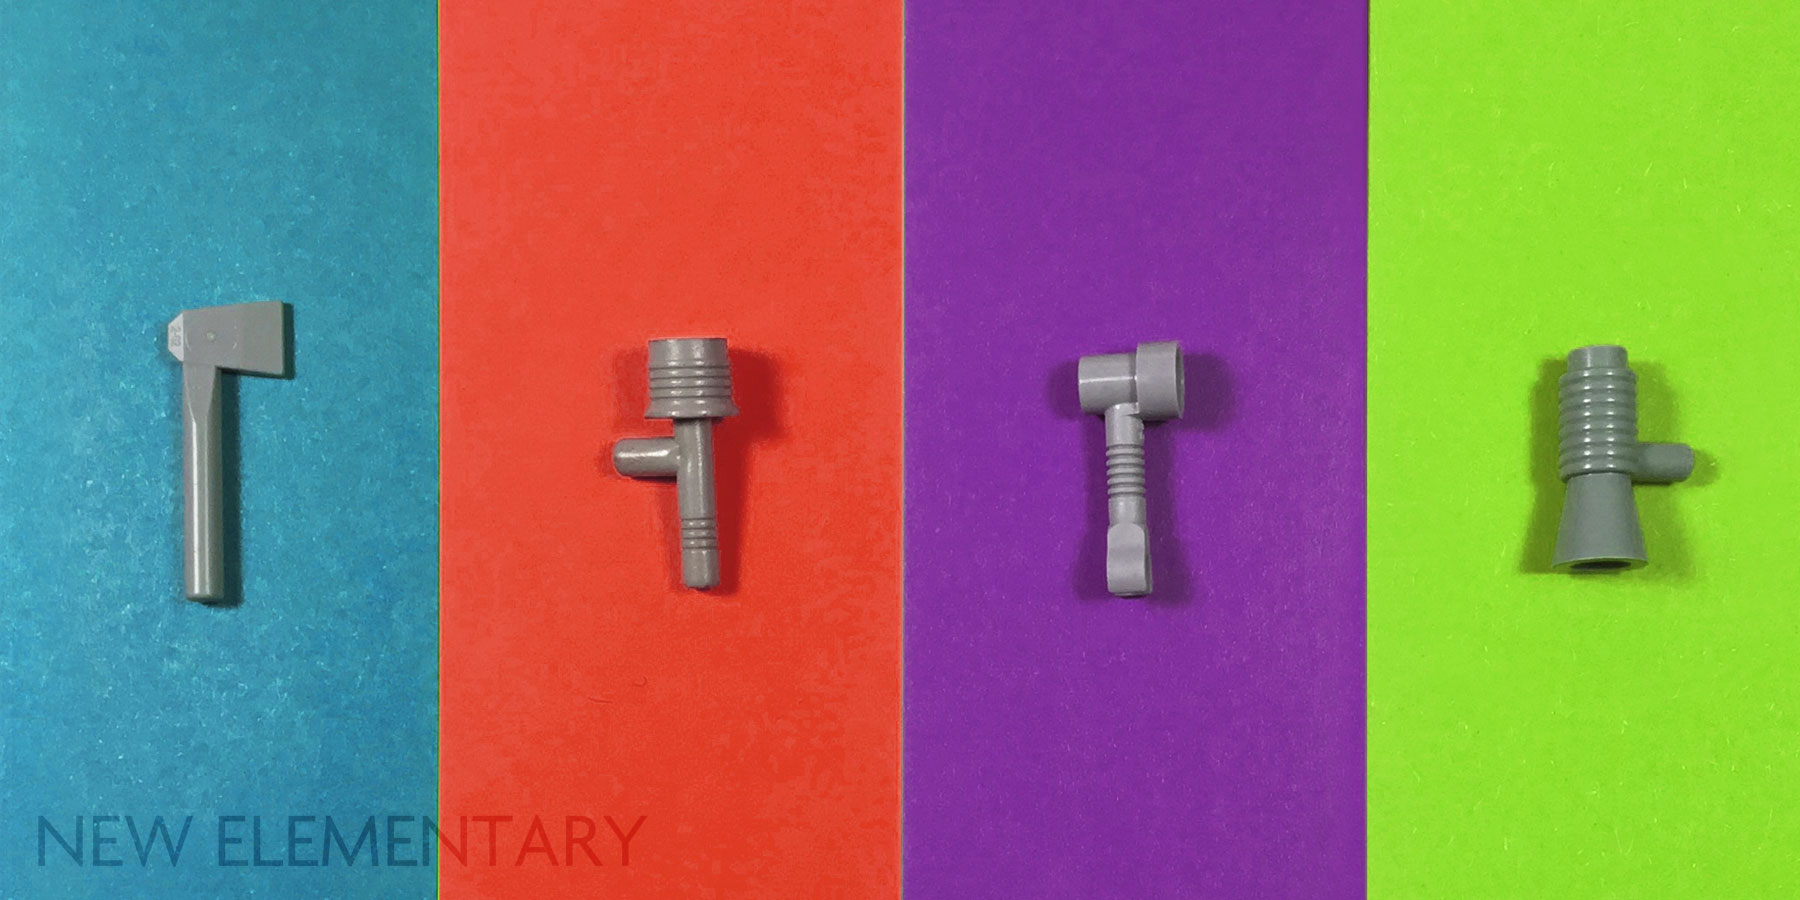
Axe (3835)
The view of the axe from above looked like a blade of some description. It struck me that I could use these to create the spokes of an alloy wheel. I am hopeless at building wheeled vehicles and spaceships don’t generally have wheels. However, they do have engines that need greebly details.
 |
| Inspecting the engine upgrades on LL 232 |
In this scene, the two maintenance engineers inspect the replacement engines while one of the old engines is in the loading bay awaiting removal. The “old” engine on the left uses the axes with my original idea as alloy wheel spokes.
An alloy wheel? Or a spaceship engine? Here's a rear view of the construction too.
I liked the result, but as an engine, it looked too much like a turbine engine, which isn’t really appropriate in the vacuum of space.
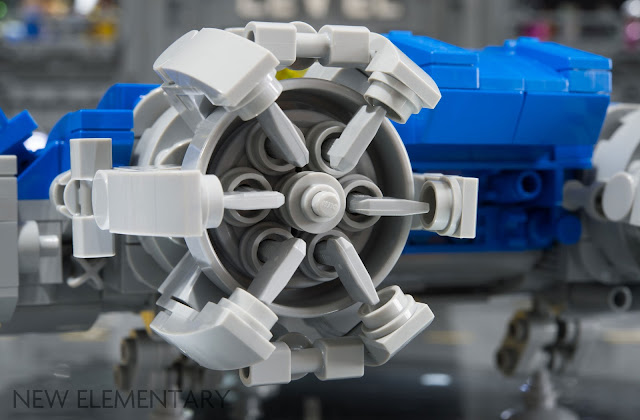 |
| A closer look at the revised engine in situ. |
Pointing the axe heads outwards allowed me to keep the axe-and-wheel technique but create a more futuristic look. It isn’t very successful at removing the appearance of a turbine engine, but I think it’s an improvement when combined with some greebly details around the rim of the wheel, lined up with the point of the axe heads, which gives me more of the sci-fi look that I wanted. Always wanting to use as many new parts as possible, I was also able to find a place for a few of this year’s Bar Holder Double with Stud Holder (84868) to embellish the build.
I imagine them being energy transducers drawing from the outer conductor arms. I hope you agree the new engine design looks like a powerful upgrade for space travel.
Here’s the rear view of the engine, revealing some of the build details. The axe handles poking through the back of the Wheel 31mm D. x 15mm Technic (60208) gave me something to build onto. I could have covered them with more studs with holes, but I decided to clip something to them to extend the detailing to create arms feeding back towards the axe heads. That also allowed me to use some of last year’s Bracket 1 x 1 - 1 x 2 Inverted (73825) parts that I’ve not managed to incorporate into a build thus far.
I removed the clips to show more clearly how the axes come through the “Wheel 31mm D. x 15mm Technic” (60208) part. As you now can see, the axe handles are completely unattached at the rear.
In this shot of the disassembled engine, you can see that I’ve pushed each axe head through a stud with hole which is then inserted into each pin hole of a Technic Wedge Belt Wheel Pulley (65668). This was used to fill the space between the inner part of the wheel and the axe head, because the axe heads cannot sit inside the rim of the wheel in this orientation. However, more by luck on my part, the heads align nicely with the outer edge of the wheel’s rim.
This assembly slides into the wheel part nicely, which is then secured in place with a 3L bar through the centre that is held in place with another stud with hole and the aforementioned clips.
Robot Arm (4735)
My second chosen element was Bar 1 x 3 with Clip and Stud Receptacle. I was sure I couldn’t build a spaceship with this part. So my first thought was to build a robot. Can’t think why. But I was cunning. I started by using two arm parts to form the torso. Pah! Take that, Robot Arm.
M4-J0R consists of six Robot Arm parts: two for the torso, one for each leg and one for each arm. I examined other options to try and not use the Robot Arm part for the robot’s arms, but visually, this solution appealed to me the most, and increased the number of times I used the part within the same build.
The biggest problem when building something more substantial with the Robot Arm part is the skinny “arm” sections. They work well for small minifig sized robots, of course. And they are the perfect size for the LEGO clip family, so I tried to come up with some techniques to bulk them out and make M4-J0R look less puny.
I also built another little robot. M1-N3R is packed with 11 Robot Arms, and is generally a dense build that is surprisingly stable. I reused the “alloy wheel with spokes” build from earlier to create what looks to me like a drilling rig.
I’ll leave you with a closer view of M1-N3R!
Space Tools will return in a fortnight's time, as next Thursday we have a review of an upcoming October release.
READ MORE: Last time in Space Tools parts fest, Dana Knudson created spacey builds
Help New Elementary keep publishing articles like this. Become a Patron!
Massive thanks go to our 'Vibrant Coral' patrons: Antonio Serra, Beyond
the Brick, Huw Millington, Big B Bricks, Dave Schefcik, David and Breda
Fennell, Richard Selby, Gerald Lasser, Baixo LMmodels, Markus
Rollbühler, Elspeth De Montes, Chuck Hagenbuch, Megan Lum, Andy Price,
Jf, Daniel Church, Amy Hays and Wayne R. Tyler.
LEGO® Shop at Home
USA: FREE SHIPPING every day on orders over $35!
UK: Free delivery when you spend £50 or more at LEGO!
Australia:
Discover the latest promotions and offers on LEGO.com
All text and images are © New Elementary unless otherwise attributed.


Sooo, where are the non space builds?
ReplyDeleteHa! I got away with it and didn't even get told off?! :-P
DeleteLove M4-J0R and M1-N3R - neat construction!
ReplyDeleteReally clever builds! I especially love the techniques you used with the axes!
ReplyDeleteI'd love to see what the axe/engines look like with the axe heads all rotated -would it make a nice hexagonal shape? (It will take me a bit to find enough axes to try this myself).
ReplyDeleteI can report it doe make a hexagon-ish. Because of how the top edge of the axe head is at a slight slope, the resulting shape definitely hss a visual twist or serrated effect. Would still be fine for engines or wheels or something, but it does not result in what I would think of as a nice even hexagon.
DeleteThanks for trying it and letting us know the results. I didn't get around to it myself.
DeleteI mean, the task doesn't seem insurmountable. An axe isn't really even a space tool to start with, unless you're trying to clear-cut Pandora the slow way.
ReplyDelete6929 (a certified classic of classic space) and 6930 (another iconic classic space set) both contain axes, light grey & black respectively - hence why the axe was included.
ReplyDeleteAre these digital builds, or is it just the way they are photographed?
ReplyDeleteReal world builds.
DeleteIt looks like a did a good job cloning out the cat hairs and the oh-so-annoying dust that gets everywhere :-)
DeleteOoh! I love that axe turbine technique. I'll have to use that in a build :D
ReplyDeleteSo much awesomeness!!!
ReplyDelete